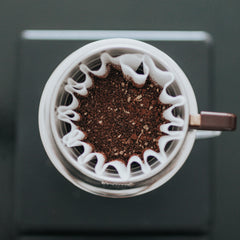
The V60 Coffee Dripper (also referred to as the V60 Coffee Maker) name, stems from the shape of the device. It is “V” shaped with angles of 60 degrees. The internal sides also have interior ridges which help with airflow during the brewing method.
WHAT YOU WILL NEED:
Hot filtered water (97C)
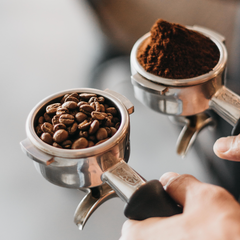
A Grinder
A V60 dripper
A V60 server/vessel to brew into (your favourite mug)
A Bonavita Variable Temperature Digital Electric Gooseneck Kettle for controlled pouring and accurate water temperature. (but a kettle works too)
V60 filter papers of the same size as your dripper (es. 01/02) (bleached filters are recommended for best taste)
BREWING PARAMETERS:
COFFEE-TO-WATER RATIO:
17g coffee to 350g of filtered hot water
GRIND SIZE:
Medium Fine – looks like sand
BREW TIME:
2.25 – 2.5 minutes
BREWING WATER TEMPERATURE:
97C
If you are using a Bonavita Variable Temperature Digital Electric Gooseneck Kettle, set your temperature to 97C. The temperature will drop a little bit when it comes to contact with the coffee. If you are using a hot water tower in a coffee shop and use a traditional (non-heated) kettle, such as the Hario Buono, set the tower to 97C degrees to compensate for the temperature drop that occurs when the water comes to contact with a room temperature kettle. Fill kettle 80% full for best temperature stability.
STEPS FOR BREWING:
- Place your V60 dripper on top of the brewing vessel, take the V60 filter paper and fold the sideline (where it has a different texture), put the cone in the V60 dripper. Using your kettle, pour a small amount of hot water to rinse the entire filter (to avoid paper taste). This will also pre-heat the brewing area and help with temperature stability.
- Remove V60 from the vessel and dispose of water used for rinsing and then put back on the vessel to start.
- Add coffee onto the filter and gently shake the V60 to level the coffee (to ensure an even and consistent water flow).
- Place your V60 kit on your digital kitchen scale. Tare your scale to zero. Also, be sure the scale is set to “grams”.
- While simultaneously starting your timer (counting up), pour 50g of water over the grounds. The goal is even saturation, so pour slowly in a counter-clockwise circular pattern. Don’t worry if you see a few drips falling through.
- If the coffee is within one week from the roast date, let the coffee bloom for 60 seconds. If the coffee is older than a week from roast, let it bloom for 45 seconds.
- After the bloom time has completed, slowly start adding more water in the same manner until the scale reads 350g. Concentrate the pour towards the centre of the V60, keeping your circles approximately one inch in diameter. The water stream should be slow enough to fall straight down, not at an angle. Brewing should take 2.25 and 2.5 minutes. If it does not, you need to adjust the speed of your pour.
- Once the stream slows to an uneven drip, and you see no more water in the V60, the brew is complete.
GOOD PRACTICES:
Adjust parameters to compensate for individual bean characteristics
If coffee is too bitter, coarsen the grind to help ease the extraction. Adapting the coffee to water ratio may then be necessary to balance the concentration.
Too long of a brewing time can lead to over-extraction; too short can lead to under extraction. Use time as a tool to fine-tune a brew.
